
You know that time when all you can think about is getting your next latte/cappuccino/flat white/.. well the list goes on! Or maybe you go hard-core? You’ve just got to have a shot or two (or three – I know, I’ve been there) of good honest espresso. But there isn’t time for a run to your local coffee shop, or the weather is bad, or maybe you just don’t want to go out. The bottom line is without an espresso machine you’re stuck. But I’m here to show you how to make espresso without a machine.
Before we dive into how to make machine free espresso, let’s be clear on some things. Like, what is an espresso? And what’s the creamy foam on top?
What is an espresso?
Espresso is a short, very strong, coffee made by forcing pressurized hot water through finely-ground coffee beans. The result is an intense dose of pure coffee flavour. It delivers everything the beans have to offer. No other coffee drink tastes as strong.
Served neat in small cups an espresso is an incredibly stimulating drink. Exciting the brain cells as much as the tongue. But that’s just the starting point. Espresso shots form the base for so many coffee drinks, honestly, without it we would have almost empty coffee shop menus. Imagine a world without lattes, cappuccinos, flat whites, cortados, macchiatos and mochas, to name a few.
But that’s not all; espresso gives you its crowning glory, the crema.
What is crema?
Crema on espresso is a layer of rich, creamy foam produced when brewing coffee under high pressure. It’s formed from many tiny bubbles of CO2 gas, released in the brewing process.
It forms on the top of espresso shots and most consider it’s an indication of a skilled barista using perfectly ground fresh espresso beans. In fact, it’s simply gas being released from the beans when hot water is forced through the grounds under high pressure. Originally, people thought it was an unwanted scum on the surface of their coffees.
But step in good marketing to convince the people it’s not a scum. Back in 1948 an Italian, Achille Gaggia, developed a high pressure espresso machine. That’s when this ‘scum’ started appearing and people refused to drink the coffee. Faced with his invention being consigned to history, Achille re-named it ‘caffe crème’, since shortened to crema. The rest is, well, history. Oh yes, Achille Gaggia – surname sound familiar?
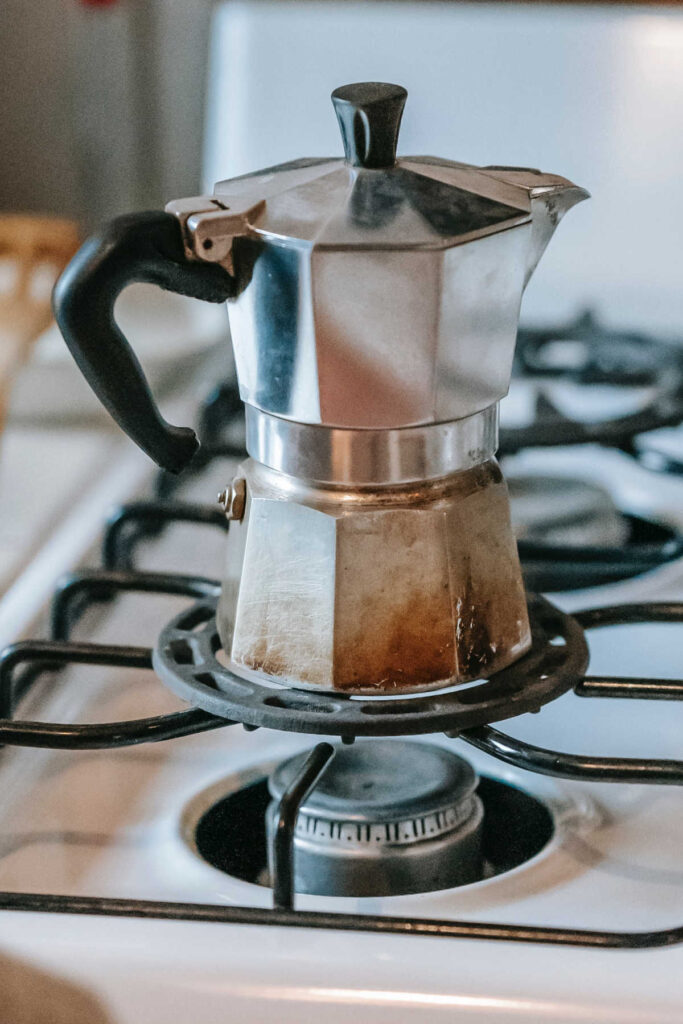
Moka Pot
Where do we begin? Let’s think which country gave us espresso. Yes, the Italians. And which country has taken coffee brewing and drinking to a fine art? Yes, Italy. So guess where there are more moka pots still in daily use? You know already. Although moka pots have been around forever, there are still some tricks to getting the best coffee out. I’m going to explain the brewing process, step by step. But for a deeper dive, check out how to brew the best ever coffee with a moka pot.
Although moka pots have been around forever, there are still some tricks to getting the best coffee out. I’m going to explain the brewing process, step by step. But for a deeper dive, check out how to brew the best ever coffee with a moka pot.
What is a moka pot?
It’s made up of three parts: a bottom chamber, which holds water; a middle basket, where the coffee grounds are placed; and a top chamber, where the brewed coffee collects.
Once primed and assembled the pot is placed on the stovetop and heated until steam builds up pressure in the bottom chamber, forcing hot water up through the grounds and into the top chamber.
How to make espresso with a moka pot
You will need
- Moka pot
- Grinder
- Coffee beans (18 grams)
- Water (36 grams)
- Kettle
- Mug or glass
- Kitchen scales
- Spoon
Method
Grind 18 grams of your best, freshest, dark roast coffee beans to a fine consistency. Not to super fine powder like an espresso machine uses, more like the size of fine sand.
Pour the grounds into the basket. Don’t tamp them down, but do tap the basket on the work surface to evenly distribute the coffee.
Put the lower chamber onto your kitchen scales and pour in 36 grams of just boiled water.
Top Tip: Why use just boiled water? Sure, you can start with cold water. But hot water really cuts down the brew time.
Insert the basket into the top of the bottom chamber. Then screw the top chamber onto the bottom chamber to finish assembly of your moka pot.
Brewing with a moka pot
Place your moka pot on low-medium heat on your stovetop and wait for the gurgling sound to begin.
Top Tip: For perfectly controlled brewing: do not be tempted to turn up the heat. Yes you will get a quicker brew. But it will taste unpleasantly bitter.
So brew with the lid open. You should moderate the heat to control the brewing process. Too hot and the coffee will not emerge into the top chamber in a flowing gurgle. Instead, it will splutter. If your pot starts to splutter, turn down the heat. If the process stops too soon, turn up the heat a little.
Don’t be tempted to brew too long. Once the top chamber contains what looks like enough coffee for your drink, remove the pot from the heat.
Leave the pot to stand for a couple of minutes to allow for any remaining steam to emerge from the bottom chamber. You can even hold your moka pot by the handle and run some cold water over the sides to cool things down. But be careful not to burn. I wear an oven glove to avoid touching the metal body of the pot.
Finally, pour into your cup or glass.
Enjoy!
Pros of making espresso with a moka pot
- Low tech, and almost indestructible.
- Easy to Use – just follow my top tips!
- Can produce great espresso
- Light-weight and very portable
Cons of making espresso with a moka pot
- Slower brewing than an espresso machine
- Practice and care needed to achieve great results.
- Little crema is formed.
French press
Another tried and trusted coffee maker, but not normally associated with making espresso. For a deep dive into the French press check out Using a French press coffee maker: what you need to know.
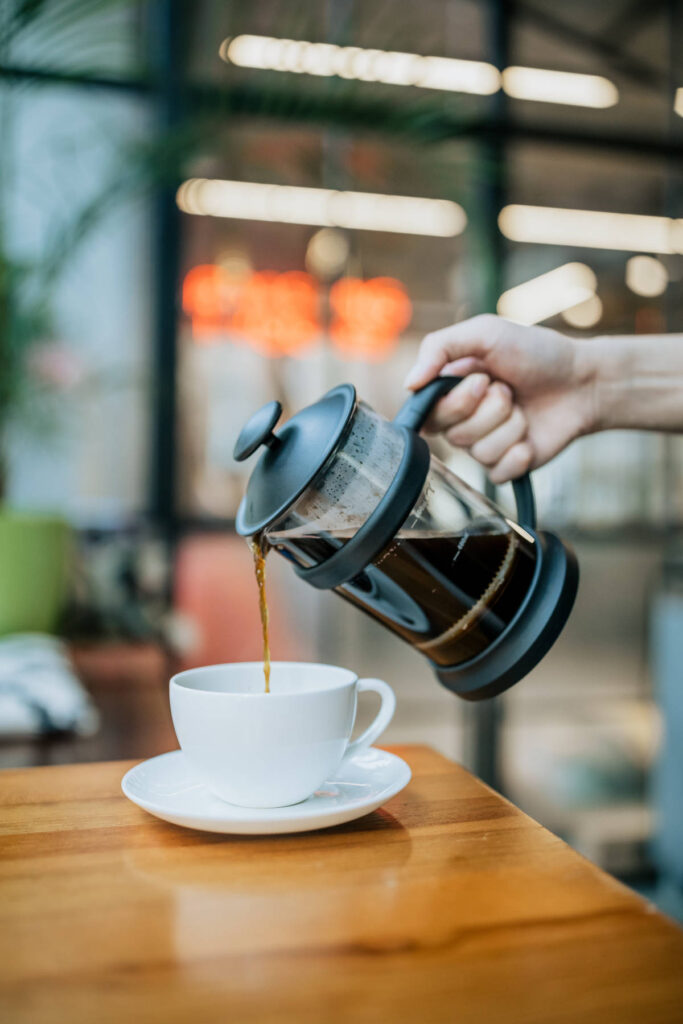
What is a French press
So simple, but highly effective. It’s just a metal or glass flask with a tight (but not airtight) filter you plunge into the flask to complete the brewing process and separate the brewed coffee from the spent grounds.
Another popular coffee maker you have almost certainly used. Making espresso is the same process you normally brew with a press, but don’t miss my top tips to get the best results. If you want a deeper dive check out: Using a French press coffee maker: what you need to know.
How to make espresso with a French press
You will need
- French press
- Grinder
- Coffee beans (24 grams)
- Water (48 grams)
- Kettle
- Mug or glass
- Kitchen scales
- Spoon
Method
Start by freshly grinding 24 grams of good quality dark roast espresso beans. Grind the beans to a coarse size, like sea salt. Any finer and you risk some of the grounds ending up in the espresso.
Pour in a little hot water to warm the press. That helps temperature control when the brewing begins. Once it has warmed, empty out this water.
Tip the coffee you’ve just ground into the press flask.
Heat the water to 200-205°F (93-96°C) and pour 48ml into the flask. Stir for 10-20 seconds to ensure all the grounds are exposed to the water. Then put the plunger into the top of the flask but do not push down.
Set a timer for 4 minutes, and get your cup mug or glass ready.
Once the timer signals the 4 minutes are up, Press down the plunger. You don’t need to press too hard, just use firm continuous pressure until the plunger reaches the bottom of the flask.
Pour your espresso into the waiting cup, mug or glass.
Enjoy.
Pros of making espresso with a French press
- Easy to use
- Versatile – can make coffee, espresso, and even tea
- Produces a rich, smooth cup of coffee
Cons of making espresso with a French press
- Lacks crema
- Coffee can taste bitter
- Timing can be complicated
- Risk of over-extraction and bitterness or under-extracted watery coffee
AeroPress
If you haven’t tried an AeroPress yet, it’s a great coffee maker. Plus, it fits all the other ‘important’ criteria: it’s not expensive, very easy to clean, small and light so you can take it with you and use anywhere.
The AeroPress is the new kid on the block by coffee maker standards, having entered the market in 2005. But it has rapidly gained a following because it’s easy to use and can produce great coffee. With some practice you can make a good espresso coffee using an AeroPress.
How to make espresso with an AeroPress
You will need
- AeroPress
- Grinder
- Coffee beans (24 grams)
- Kettle
- Water (48 grams) heated to 180-190°F (82-88°C)
- Cup, Mug or glass
- Kitchen scales
- Spoon
Method
Brewing espresso with an Aeropress is a great alternative to using an expensive espresso machine. Here are the steps you need to follow:
Grinding the beans
Grind your coffee beans into a fine powder using a grinder. The grind size you are aiming for is like sand. Don’t be tempted to grind to a powder as that could block the filter.
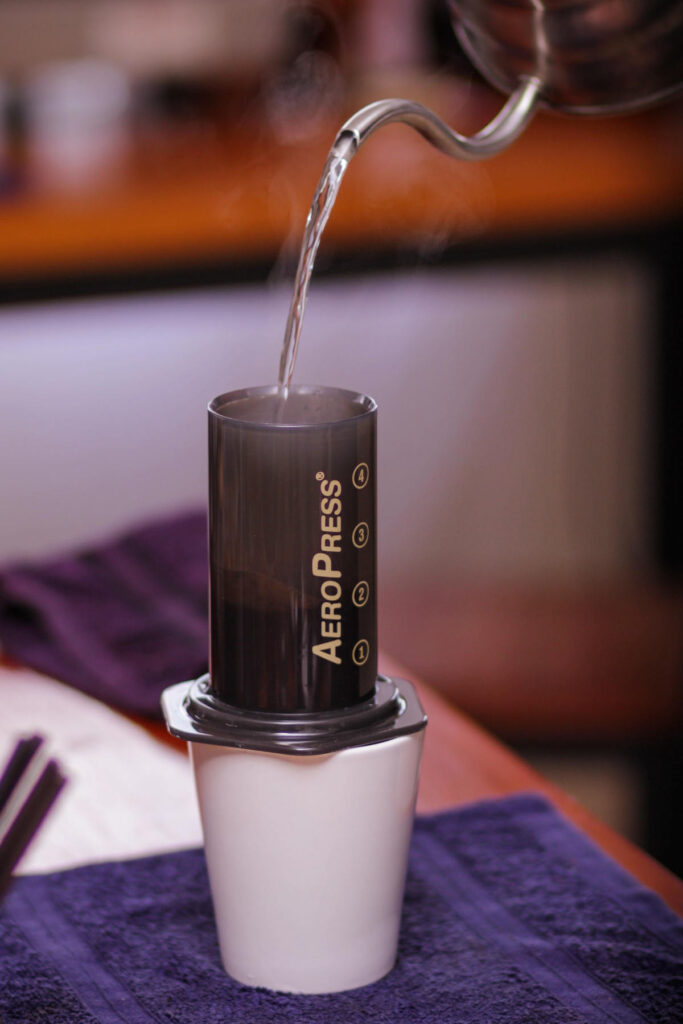
Inverted brewing
To make espresso with an AeroPress you have to use the inverted technique. The what? I hear you saying. It’s just turning the AeroPress upside down to enable the brew to be consistent.
If you think about using your AeroPress, you probably put a filter into the cap, screw it into the bottom chamber then stand it in a mug or glass before adding coffee and hot water.
You’ve probably noticed that while the coffee is brewing, the water level goes down while it’s in the brewing chamber. That’s because some is working its way past the filter and into your mug or glass.
With the inverted technique, you put the plunger into the top of the brew chamber (but don’t press down. Then turn it upside down. When the coffee brews it’s all kept in place until you decide to complete the brewing process.
Brewing process
Place 24 grams of ground coffee into the chamber of the Aeropress. You pour it into the chamber so it falls onto the plunger.
Next, pour 48 grams of hot water (aim for 200-205°F (93-96°C) into the chamber. Stir for 10 seconds to ensure all the grounds are exposed to water.
Set a timer for 4 minutes.
Top Tip: the AeroPress does not create the high levels of pressure found in espresso machines, so it will not brew an espresso in seconds. That’s why you need to set the timer for four minutes to allow the coffee to be extracted as fully as possible.
Once the timer signals the 4 minutes are up, place a filter into the bottom cap and screw it onto the chamber.
This is where you need to be coordinated. You need to position a mug or glass, upside down over the cap and then pick up the mug and AeroPress together and turn the right way up.
Once it is upright and standing on top of your mug or glass, press down the plunger as normal. You don’t need to press too hard, just gentle but continuous pressure. Continue pushing through the hissing sound until you reach resistance.
You have brewed your first AeroPress espresso.
Enjoy!
Pros of making espresso with an AeroPress
- simplicity
- affordability
- Easy to clean
- Very portable – I take mine hiking
Cons of making espresso with an AeroPress
- Longer brew time than expected
- Little to no crema produced
- Experience needed for best results
Manual espresso maker
What is a manual espresso maker
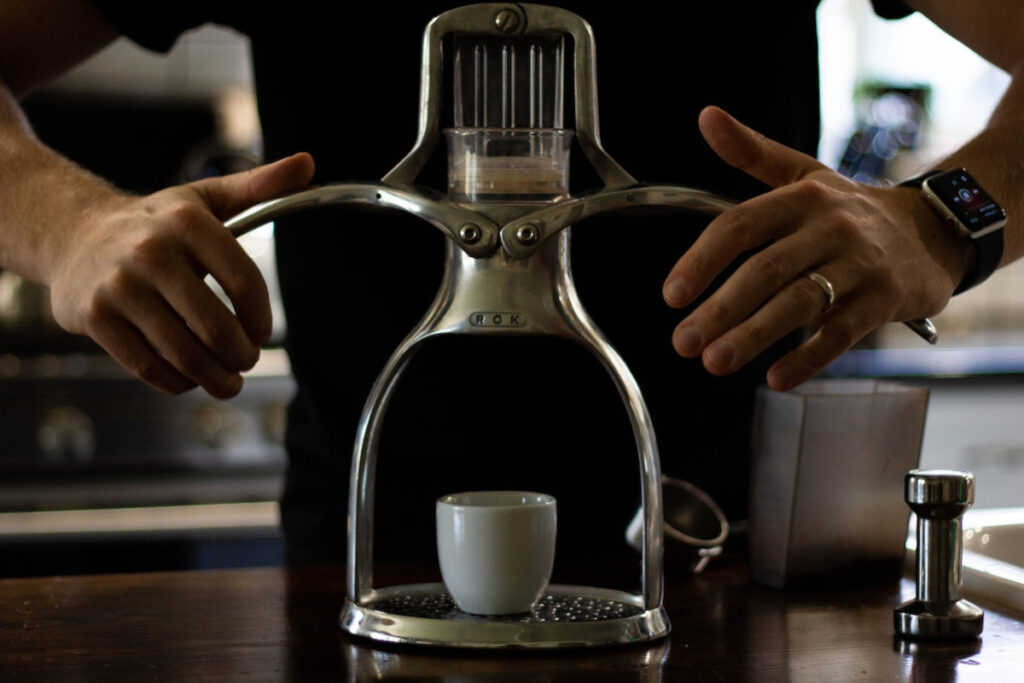
Sometimes called a lever espresso maker. Manual espresso makers substitute clever electronics, pumps and water control systems for simple manual labor.
The designs vary widely, but essentially, you put ground coffee into a holder or portafilter, pour in hot water and use a lever (or two) to create pressure. Clever design enables the best ones to produce similar pressure levels to automatic espresso machines.
That means, with practice, you can produce espressos every bit as good as a home espresso machine.
How to make espresso with a manual espresso maker
Brewing espresso without a machine can be a challenge, but with a little practice it can be accomplished quite easily. In order to make espresso without a machine, you will need:
You will need
- Manual espresso maker
- Grinder
- Coffee beans (18-20 grams – depending on the maker you are using)
- Water (36-44 grams – again, depending on the maker)
- Kettle
- Mug or glass
- Kitchen scales
- Spoon
Method (design dependent)
Top Tip: always follow the instructions for the manual espresso maker you are using. The following instructions are a rough guide on the technique most employ.
Place 24grams of ground coffee into the chamber or portafilter. You pour it into the chamber so it falls onto the plunger.
Tamp down the grounds, like you see baristas doing in coffee shops. It ensures there are no air gaps and the compressed grounds will not let the water pass too quickly.
Top Tip: Manual makers need to be sturdy to cope with the forces you need to exert. That means they are made of metal. Which leads to the biggest issue affecting the brewing process: if you don’t pre-heat the mechanism, it will leech heat from the water you pour into the brew chamber. So you need to get the maker as hot as possible. Some you can pour water over, others you can partially immerse. Or you can make a first preparatory shot (without coffee) just to warm the maker, then pull a second shot with coffee.
Next, pour boiling water (aim for 212°F (100°C) into the chamber.
Press down on the lever. Most instructions tell you to aim for a certain pressure, or time to complete the lever motion.
Pros of making espresso with a manual espresso maker
- Some look like pieces of modern art
- You are fully involved in the brewing process.
- Can make great espresso
- Easier to clean and maintain than an espresso machine
Cons of making espresso with a manual espresso maker
- Takes physical effort to operate
- Practice needed to make consistently good espresso
- Some are more expensive than automatic espresso machines.
Espresso without a machine

This is the simplest method possible for making espresso style coffee. It requires no coffee maker or machine. With practice you can create a good drinkable coffee.
If you just absolutely, without doubt, have to drink an espresso right now, but you cannot fire up any other coffee maker, then this is the method for you.
I must warn you it is easier to get wrong than right, but in a coffee emergency I’m sure you will do just great!
How to make espresso without a machine
Yes, you really can make espresso type coffee with just hot water and ground coffee, no machines or expensive equipment.
You will need
- Pre-ground coffee (18 grams)
- Water (36 grams)
- Kettle
- Two Mugs or glasses
- Kitchen scales
- Spoon
- Fine mesh strainer
Method
First, measure out the pre-ground coffee you will need, and pour into the first mug or glass. Why pre-ground? Well, in line with the no machine approach, let’s simplify as much as possible by cutting out coffee grinders.
Pour in just-boiled water and stir well. Let the coffee steep for 5 minutes.
Pour the coffee through a fine mesh strainer into the second mug or glass.
Top Tip: warm both mugs and glasses by rinsing with hot water before using them. This will minimise the heat loss during brewing. Plus, when pouring the coffee through a strainer (to remove the coffee grounds) pour slowly to cause as little disruption of any grounds that have already settled to the bottom of the first mug or glass.
Enjoy.
Pros of making espresso without a machine
- Cheapest method possible
- Simplicity: just ground coffee, hot water, 2 mugs and a strainer.
- Ultimate portability no need for any special equipment.
Cons of making espresso without a machine
- Difficult to achieve consistency
- Water temperature and brew time are difficult to get right
- No one will be fooled that you have brewed a real espresso.
Espresso with a pod coffee maker
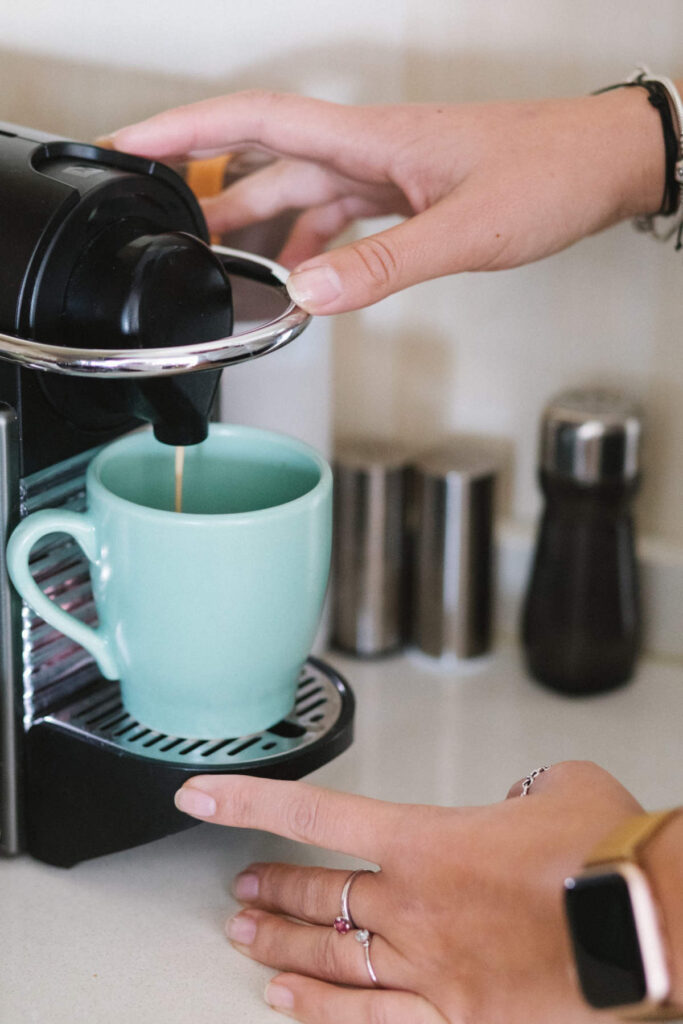
Speed and convenience comes to making coffee at home, but at a price.
Pod coffee makers have revolutionised coffee drinking for many people. Before they came onto the market, most people never got beyond instant coffee or maybe filter coffee. But then pod machines made better coffee available for little effort. So we should embrace them for introducing millions to what better flavor coffee looks, smells and tastes like. Then, one day, they may join you and me on our journey of discovery, seeking the perfect brew.
What is a pod coffee maker
As the name implies, pod coffee makers rely on brewing coffee with a pre-prepared pod put into the machine. There are many different brands in the market, with some capable of producing very high quality espressos.
How to make espresso with a pod coffee maker
Probably the easiest way to make espresso at home. Few pod coffee makers any range of adjustment for water amount or brew time. So you will get consistent results.
You will need
- Pod coffee maker
- Mug or glass
- Espresso coffee pods
Top Tip: It seems obvious, but make sure you buy pods that fit the maker you are using. With so many brands on the market, it’s easy to mistake the packaging of one for another.
Method
Ensure you have enough water in the water reservoir. Top up as necessary.
Put an espresso pod into the coffee maker, and close the pod cover
Turn on the coffee maker and wait for it to heat up
Place a mug or glass below the spout under the pod bay.
Press the operation button (varies from one machine to another. Some commence operation when the pod housing is clicked into place).
The coffee will pour into the mug or glass.
Enjoy.
Pros of making espresso with a pod coffee maker
- Quick and easy to use
- Consistent results are easily achieved
- Some produce reasonable espresso with crema.
- Huge choice of different brands at a range of prices
Cons of making espresso with a pod coffee maker
- Produces lower quality espresso than traditional machines
- Often expensive due to the cost of pods
- Limited choice of coffee to brew.
Top Tip: Yes, there are re-useable pods that can be filled with any coffee you choose, these are often quite tricky to use and can result in spillage.
And the winner is…
The answer to this really depends on what you want to achieve, and how much you are prepared to pay. Oh, and how much effort and practice you want to commit.
Best Overall espresso maker
Undoubtedly, the best espresso makers here are the manual espresso makers. They can produce very good espresso, of easily the same (or better) quality as a home automatic espresso machine. The limitations are few, but significant. Most importantly they need a degree of expertise to get the best outcomes.
Most reliable (and easiest to use)
Pod coffee makers generally don’t allow you to exercise much control. Simply load, press the button and drink. But therein lies the delight, if you enjoy the coffee they brew, a pod coffee is simplicity to make and regularly repeat. The biggest ‘if’ is if you actually like the drink produced. Remember you have little to no control over the process, the type and amount of coffee and the dose and temperature of water.
Honourable mention
It didn’t win overall, but the AeroPress is inexpensive, very light and portable and with practice can produce great espressos, with reasonable crema. It’s just a question of whether you want to put in the practice to perfect the process.
I have taken the trouble to learn what works best with an AeroPress and now reap the rewards. Yes, I can enjoy a decent espresso anywhere – even out hiking.
Hi, I’m Eric Loftuss, co-founder of Bean Thirst with my wife Sophie.
My Coffee journey started young. I used to help my mom with the weekly shopping trip and we always called in to a coffee wholesaler and retail outlet in our town.
I really started to learn about coffee when, while in college, I worked in a local coffee shop and trained as a barista. Even though I went on to qualify and work as a lawyer, I still get a kick out of brewing a cup of Joe.
Sophie and I are so glad to be part of your coffee journey. Find out more about us